Showing posts with label Memento Inks. Show all posts

13 March 2024

The Paper Shelter #587 ~ A Cherry Birthday

 Hello crafting friends and welcome to our newest challenge at the The Paper Shelter. 


Team A - our challenge this week is Spring Colours

I love Spring as it is an indication that Summer is just around the corner. One of my favourite fruits is cherries.  Once upon a time, when I was a child, I used to go with my cousins to a cherry orchard to help pick cherries.  Not too sure how many made into the basket though, but it is one of my fond memories  😀

When I saw this cute image called Cherie Cherry, these fond memories inspired me to make this card.


I used the 6" x 6" Terrific Towers die from Made to Surprise to cut the base and all the layers of my card.  The cardstock is Bazzill and the cherry pattern paper is from Doodle bug.


Here is a close up of this cutie.  To make the background I used a Clouds stencil, from My Favourite Things, and Memento's Summer Sky ink and created the sky.  I cut out two grassy borders using a die from Precious Marieke.


On the back I made a panel for the greeting and for me to write my personal message.  The Happy Birthday die w/Shadow is from Kat Scrappiness.  To add a little more interest, I cut out a few ladybugs and scattered them around. The little ladybug die was a gift from a crafts company, and I cannot remember which one, I'm ashamed to say.  If any of you know, please leave a comment below so that I can update this post.  I blame it on old age and the fact that I forgot to write it down.  😀 I also have a gold fish and a cute lil hibiscus from this same company.


This is a 6" x 6" card and fits into a 6.25" square envelope perfectly.  It will need a little extra postage as it is not one of the normal sizes used in the US.

So this is it for my card for this week.  Remember that The Paper Shelter offers a $30 gift certifcate to one lucky winner!  In order to get this prize, you must use a product from The Paper Shelter.  However, if you don't use a product from The Paper Shelter, you still stand a chance of winning 3 digis of your choice. 


I hope you will come join the fun and share your projects with us.   You will find our challenge blog HERE.

Crafty hugs,


28 October 2022

Fairy Stamper ~ Witchy Inn Stitched Card

 Hello friends and welcome back to my Fairy Stamper Friday share!


I used a purple and brown colour combo stitching on these daisies.  Not liking it very much for the project I had in mind, the idea came to me that it would be perfect for a Halloween card.  What do you think?
I needed a slim panel to put on this card and so the Witche's Inn came to mind.  This turned out to be a one layer card as I inked and stamped straight onto the front of the card.


On the inside, I placed a purple panels on the inside of the card, one of them covering all the stitching.


I made a slim panel to put on the inside of the card with my greeting and where I will write my personal message. 

Below is the list of supplies I used, each one linked to the Fairy Stamper store, for your convenience.

 Fairy Hugs Stamps - Witches Inn, Witchy Dwellers, Halloween Hello
Marianne Design - Stitching Daisies
Distress Oxide Inks - Chipped Saphire, Villainous Potion, Black Soot
Memento Inks - Tuxedo Black
DMC - Variegated Purple and Plain Brown - 4 strands thick
Copic Markers

Thanks so much for stopping by today.  I hope you will come play along with us and share your magical creations on our Facebook group.

Till next time,
Happy Halloween!

09 September 2022

Fairy Stamper ~ Trick or Treat

 Hello friends and welcome back to my Fairy Stamper Friday share!


With Halloween around the corner, I need to continue working on my cards, so with this in mind I made this slimline card of these cute kitties going trick or treating 👻


I began by stamping the 3 kitties on a piece of 8 3/4" x 3 3/4" cardstock and on masking paper so I could make masks for them. Then I stamped the pumpkin house and also make a mask for it. Once all the masks were cut and put in place, including the moon mask, I began inking the background creating the different elements of the landscape by tearing strips of copy paper and using them as masks.  I then stamped the stacked pumpkins twice onto white cardstock and coloured them in using copic markers. This is where Memento Ink comes in handy because if you allow your stamped image to dry for a couple of minutes, it won't run or smudge when colouring with copic markers.  Once the pumpkins were all coloured in, I fussy cut each stack and adhered them to the card.  Lastly, I stamped the two little witchy dwellers.


On the inside, I used the same Distress Oxide Inks to create a frame around my card, and then stamped the Halloween greeting in the middle.  I also added a couple of the little witches for a little fun.  Once all done, I adhered both mats to a 9" x 4" dark purple cardstock base.


Even though I don't often do this, I decided to decorate the envelope too.  I did a light ink blending around the edges, using the same Chipped Saphire, Villainous Potion and Black Soot Distress Oxide inks,  and added a few of the witchy dwellers for good measure 👻

Here is the list of supplies I used, each one linked to the Fairy Stamper store, for your convenience.

Fairy Hugs Stamps - Milo, Shadow, Ziggy
Fairy Hugs Stamps - Pumpkin House, Pumpkin Stack
Fairy Hugs Stamps - Witchy Dwellers, Halloween Hello
Tim Holtz - Moon Mask

Thanks so much for stopping by today.  I hope you will come play along with us and share your magical creations on our Facebook group.

I'm playing along at

Till next time,
crafty hugs!


19 August 2022

Fairy Stamper - Tea Time

Hello friends and welcome back to my Fairy Stamper Friday share!


My little granddaughter was invited to a tea party to celebrate a friend's birthday.  While talking to her about it, I showed her one of the tea sets I have, and although I don't have any that look like this, it was the inspiration for this card 😀


This card was very easy to put together and it's pretty much self explanatory. If you're one of my followers you know how I enjoy mixing stamps and dies to get the look I'm after, so this card was fun to make. 

Here is the list of supplies I used to make this card, all linked to the Fairy Stamper store, for your convenience.

Fairy Hugs Papers - Lavender Dilly
Fairy Hugs Stamps - Gingko Branch, Like a Teacup
Fairy Hugs Ink - Black Raven
Memento Ink - Northern Pine

Thanks so much for stopping by today.  I hope you will come play along with us and share your magical projects on our Facebook group.

Till next time,
crafty hugs!


29 July 2022

Fairy Stamper ~ Snowy Village

  Hello friends and welcome back to my Fairy Stamper Friday share!


This is my last card in my Christmas in July series.  I must admit that I had a lot of fun creating this scene using various stamps sold at the Fairy Stamper store.


I began with the mountains at the top, then stamped the village and then the deer.  I stamped the mountain range and the village with Tuxedo Black Memento ink.  I find that this is the best ink that plays well with copic markers. The deer and the large partial tree were stamped with VersaFine Clair ink as I wanted clean and crisp solid images.


On the inside I did a little stamping too in order to round it all up :-)

Now for the supplies I used, each linked to the Fairy Stamper store, for your convenience.
There are a few stamps that I used that were purchased during a Special Order event.  The best way to know about these events, that happen every so often, is to subscribe to the Fairy Stamper newsletter HERE.


Thanks so much for stopping by today.  I hope you will come play along with us and share your magical creations on our Facebook group.

Till next time,
crafty hugs!

22 April 2022

Fairy Stamper ~ Sunflowers

  Hello friends and welcome to my Fairy Stamper Friday share!


Sometimes inspiration comes from the simplest moments, like going thru your front door :-) I will share the inspiration pics at the end of this post in case you'd like to take a look.


As you may have guessed my inspiration were sunflowers.  I had seen Sam Calcott make this type of Multi Diamond card and wanted to give it a try, and felt that the Sunflower stamp, from Fairy Hugs, was just perfect.


First I watched the tutorial, then went thru my scraps drawers to find the right papers and then started cutting all the bits and pieces.  Lots of cutting and gluing, but I love the effect of all the diamonds.  Then I used a piece of smooth white cardstock, and using my MISTI, I stamped the sunflower. I made a mask and stamped the stem with VersaFine Clair Shady Lane ink, and the flower with Memento Tuxedo Black ink.  This is because Memento inks play nicely with copic markers which is what I used to colour the sunflower.  Lastly, added a couple of the cute Bees, also from Fairy Hugs stamps.  I coloured them with copic markers and using Wink of Stella pen to give their tiny wings a bit of shimmer.


Because the acetate kept sliding flat, I added a stopper to the middle ...


... and used a panel at the back to stamp my sentiment and another few bees.  The sentiment is called Deepest Wishes, and it's also from Fairy Hugs stamps.


Closed this card measures 6" x 6" and fits perfectly in a matching envelope.  It will, however, need a little extra postage, but in this case, I think it's worth it :-)

Now, as promised, here are the pics of what inspired me to make a sunflower card. 


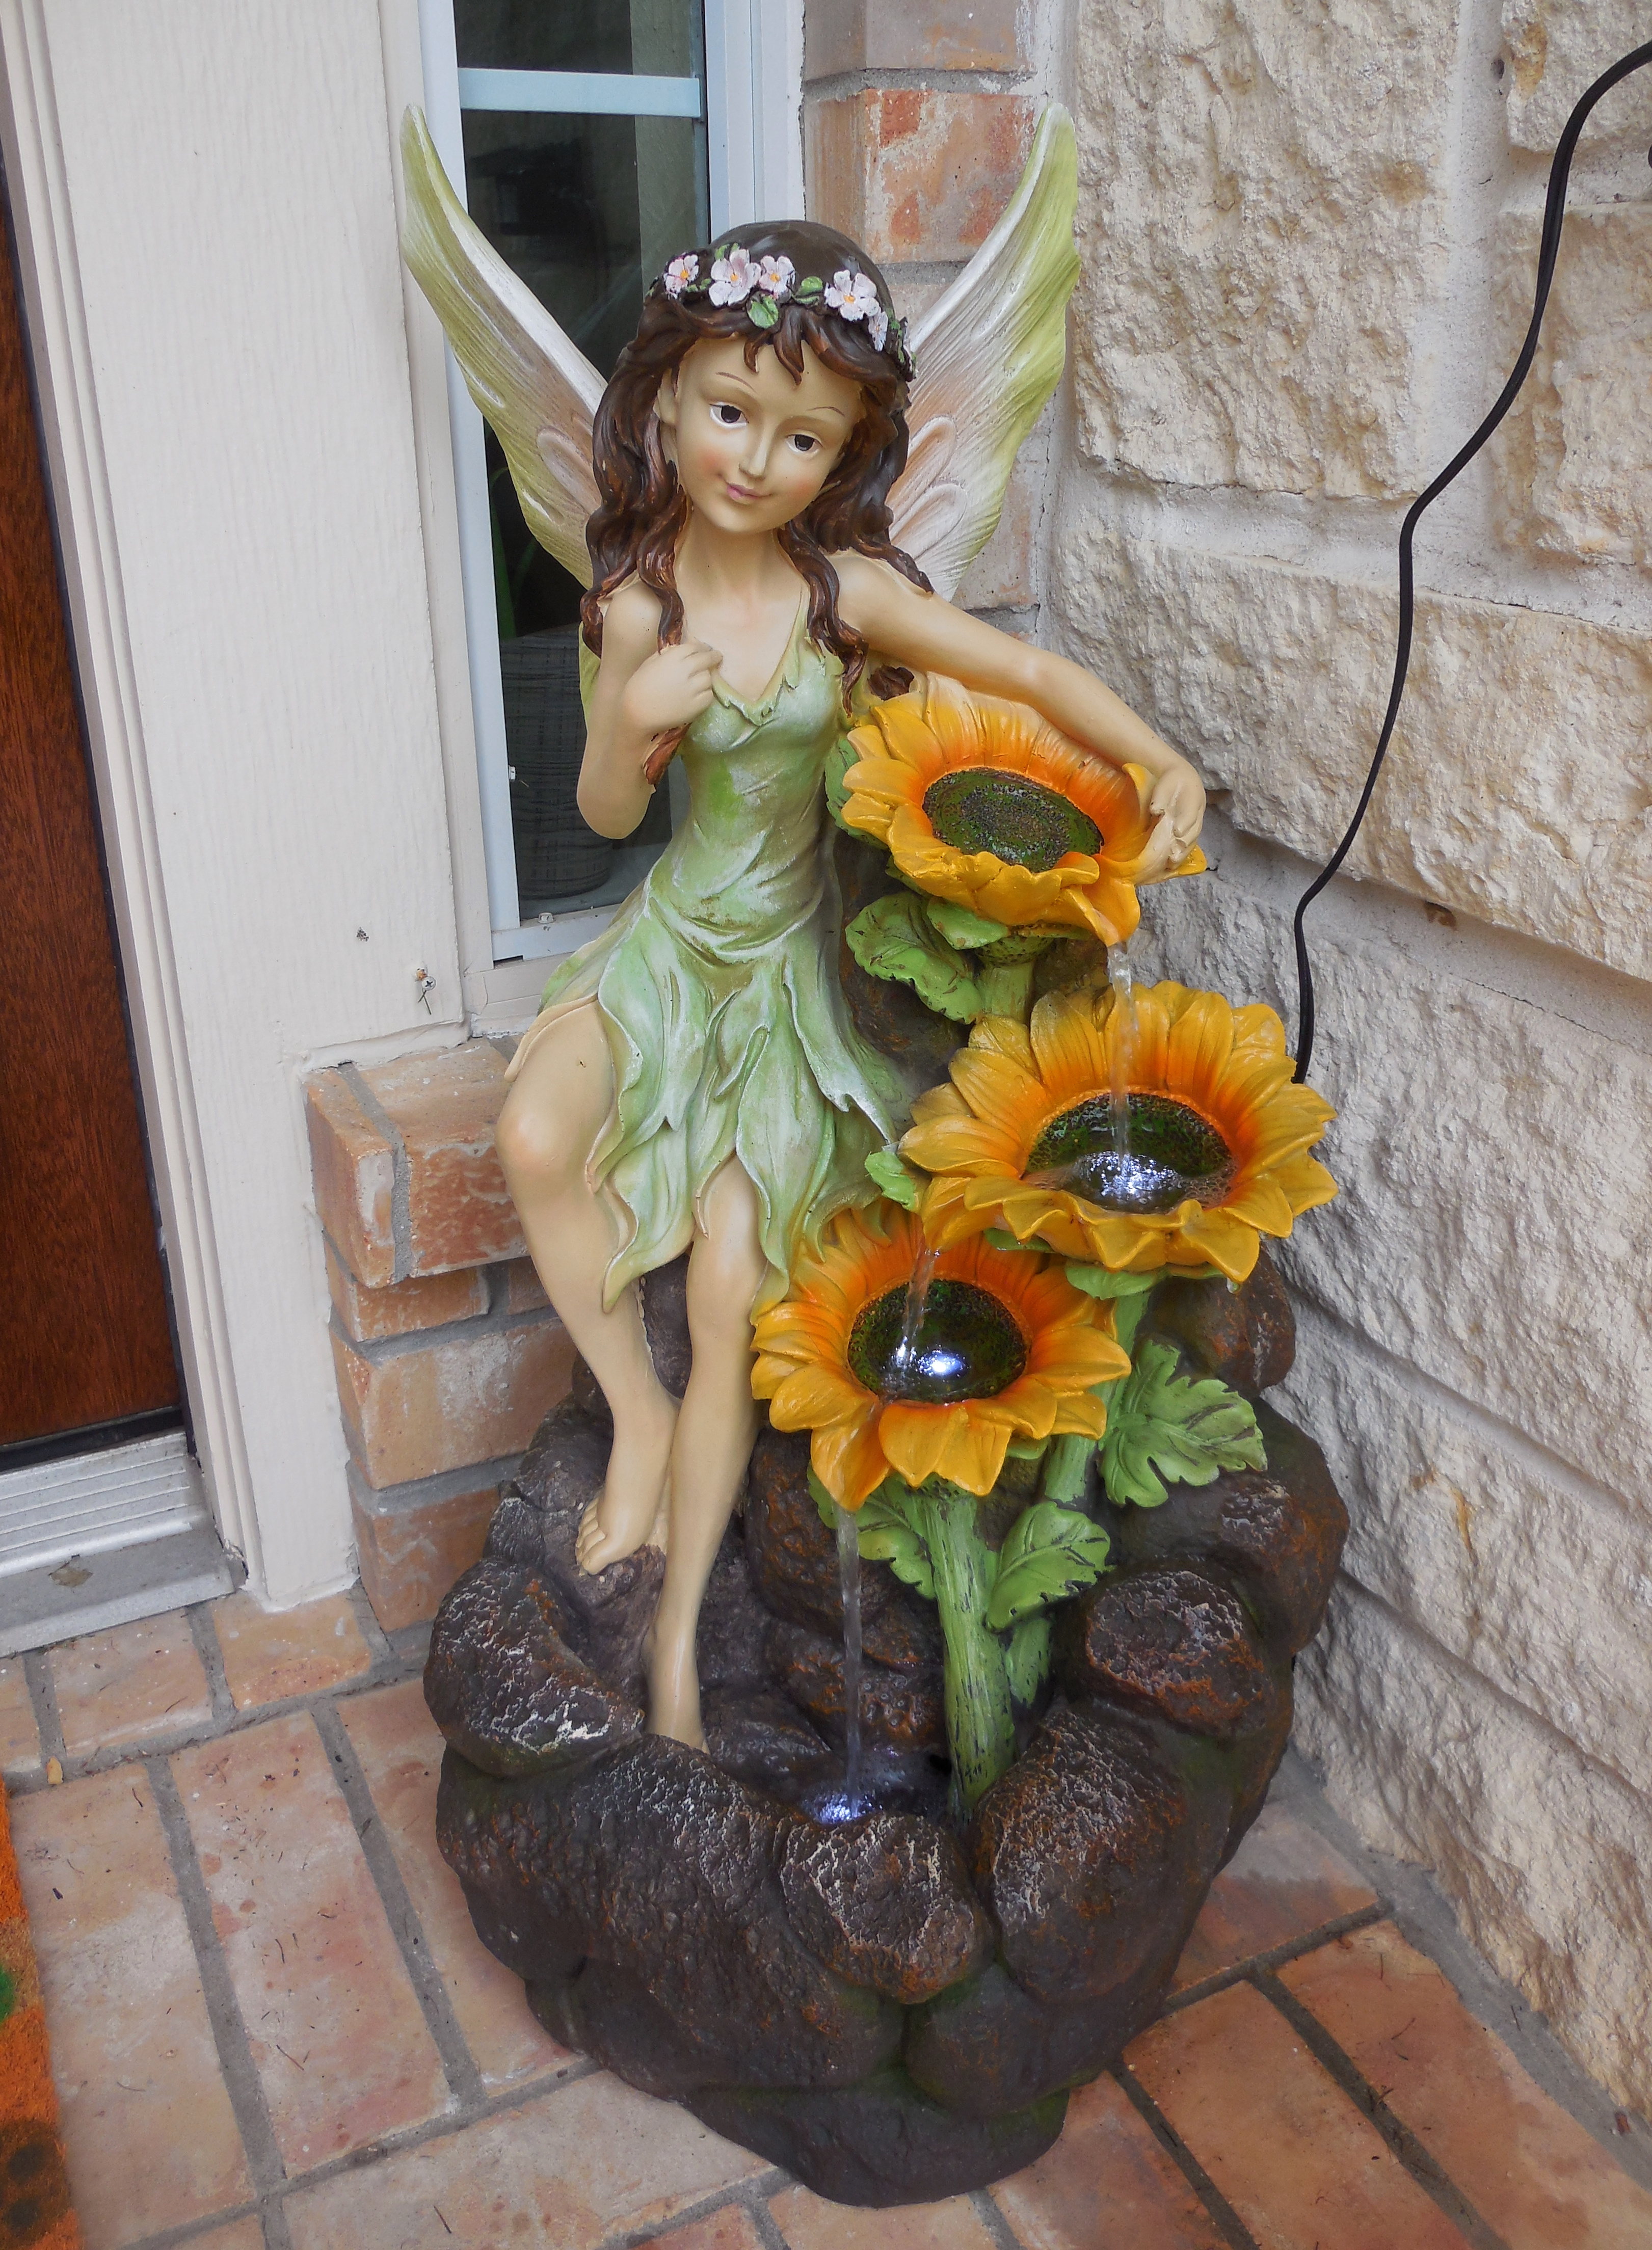
This is the front door to our home.  Hubby gave me this beautiful fairy fountain on my birthday.  I'd been eyeing it out and he must have noticed.  I then got the doormat to match :-)  Although my favourite flowers are hibiscuses, plumeria and orchids, I pretty much like all flowers.  Sunflowers, like daisies, are such beautiful and happy flowers, don't you think?

Thanks so much for stopping by and sharing a little bit of your day with me.  I hope you will come play along with us. Our challenges go live on the first Thursday of each month on our Facebook group.   All you have to do is to create a project using your stamps, and upload the pic to our challenge album.  There is a prize drawn for one lucky crafter, at the end of every challenge. 😀

Till next time,
crafty hugs!

01 April 2022

Fairy Stamper ~ Easter Egg Fairy Branch

 Hello friends and welcome to my Fairy Stamper Friday share!


Now I know that Easter Eggs are not normally found on tree branches, but in Fairy Land ... well, anything can happen, and look how much fun those bunnies are having trying to get to the Easter Eggs.  They already got two down, only five more to go!😀


I started by using an die to cut out this egg.  Next I adhered the inside of the egg to my glass craft mat and did the background inking of the sky and the sky.  Next I stamped and masked the Bunnies, and inked the grassy meadow.  I stamped the Dragon Fruit Branch leaving out the dragon fruit parts.  I then stamped several Easter Eggs from the Spring Hares stamp set, coloured them and cut them out.  The it was just a matter of colouring the leaves and adhering the Easter Eggs to the branch and a couple on the grass.  I didn't really like all the green space at the bottom of the egg, so using two different shades of green I stamped a little Spring Meadow grass.
I embossed the background but it looked a little too busy for my taste, so I die cut the egg again, out of the same blue cardstock, and did a bit of paper piecing so that all the pieces of the egg were not embossed.
Lastly I die cut a few flowers and put them around the egg with little pearls as their centers.


On the inside, I inked the sky, stamped a little more of the grass and placed a couple of eggs, and a carrot for good measure.  After all, you can't have bunnies and no carrots, right? 😀 Lastly I stamped the sentiment and called it done.

I have linked the stamps and inks I used to the Fairy Stamper  store.

Fairy Hugs stamps ~ Bunnies, Dragon Fruit Branch, Sivelle (for butterflies)
Nellie's Choice stamps ~ Spring Hares, Spring Meadow (special order event)
Distress Oxide inks ~ Tumbled Glass, Broken China,
VersaFine Clair inks ~ Shady Lane, Rain Forest

Other products I use on my card
Memento inks ~ Tuxedo Black, Toffee Crunch
Elizabeth Craft Designs ~ Entwined Egg
Darice Embossing Folder ~ Basket Weave
Sunny Studio ~ Eggs to Dye For (sentiment)

The stamps I used from Nellie's Choice were purchased during one of the International Stamps sale events that Fairy Stamper has every once in a while.  The best way to know about these is to subscribe to the Fairy Stamper's newsletter HERE.

Thanks so much for stopping by today.  I hope you will come play along with us. Our challenges go live on the first Thursday of each month on our Facebook group.   All you have to do is to create a project using your stamps, and upload the pic to our challenge album.  There is a prize drawn for one lucky crafter, at the end of every challenge. 😀

Till next time,
crafty hugs!


11 February 2022

FS ~ With Sympathy

  Hello friends and welcome to my Fairy Stamper Friday share!


Unfortunately I needed another one of these cards. Trying to keep it simple but elegant, I used the Fairy Hugs Wild Rose stamp as the focal point of my card.


To stamped the rose using Memento Northern Pine ink and coloured it with copic markers.
I used a fancy border from Marianne Designs, a few butterflies cut out using a MS punch, and stamped the Sympathy sentiment.  I used my Silhouette to cut out the oval mats.


On the inside I used the same oval die cut for my personal message. As a finishing touch I added another few butterflies, and that was it.  Sometimes, it only takes one stamp to achieve the look you're looking for, and this was one of those times.  I wanted to use the little sweet butterfly that comes with the Sivelle stamp set, but the pink cardstock is textured, so it was the MS punch to the rescue in this case.

Thank you so much for stopping by today.  I hope to see you playing along with us. Our challenges go live on the first Thursday of each month on our Facebook group.   All you have to do is to create a project and upload the pic to our challenge album.  There is a $15.00 prize for one lucky crafter 😀

Till next time,
crafty hugs!

09 January 2022

Fairy Stamper ~ Sneak Peek ~ Love Shack

 Hello friends and welcome back to another sneak peek of our new release coming out tomorrow.  


Fairy Hugs will be launching 33 new stamps and 7 stencils on The Craft Store show.  Julia Watts will be demonstrating these new stamps and stencils starting tomorrow, 10 January and will continue on the 11th.  Here is the link to the times these shows will air ~ https://thecraftstore.com/tv-schedule

My card today shows you the Fairy Hugs Love Shack which I have used in a non Valentine way.  In fact I have used it as a Houston Spring day with a surprise Freeze that happens every now and then kinda way!  It's so bad that even the ducks don't know whether to come or go :-)


I began by using a pre made background and arranging all my pieces to see where masks were needed.  Next I started stamping the different images, using a variety of inks, depending on which items needed to be coloured in.  When all the stamping and colouring was done, I added a few finishing touches with a red glaze pen and added the snow using my trusty white Signo pen.

I have a list of supplies for you but remember that some of the items will only be available tomorrow at the Fairy Stamper store during our release.

Fairy Hugs Stamps
Love Shack, Fence, Horse & Foul, Stone Walkway, Flying Birds
Memento Inks
Rich Cocoa, London Fog, Bamboo Leaves
VersaFine Clair Inks
Shady Lane, Pincecone
Brilliance Archival Inks
Coffee Bean

Like I mentioned on Friday, this release is definitely one of my favourites :-)  I hope you have a few minutes to watch the launch tomorrow on The Craft Show.  To see more sneak peeks until then, come join us on our Facebook group page where the DT will be showcasing their projects using products from the Fairy Hugs' new release.

Also, remember that our challenges go live on the first Thursday of each month on our Facebook group.   All you have to do is to create a "Magical" project and upload the pic to our challenge album.  There is a $15.00 prize for one lucky crafter!

Crafty hugs,

15 December 2021

Dies R Us #183 ~ Away in a Manger ...

 ... no crib for his bed,
The little Lord Jesus laid down his sweet head ...

Hello everyone and welcome.  Our new challenge at Dies R Us begins today.


Challenge #183 ~ Anything Goes! 
(As long as you use a die sold at the Dies R Us store) 

I can't tell you how many dies I have for the Nativity Scene and every time I see a new one ... well, it makes its way to my stash 😀

This card is made with the latest Nativity set die that I recently purchased during one of  Dies R Us' special order sales.  The best way to know when these sales take place is to subscribe to the Dies R Us newsletter HERE.


Most of my Nativity sets have several itty bitty pieces that you have to cut and then use them to assemble each character. This die is a lot simpler to use. Each character is one piece.  You use the die itself as a stencil to colour in each element. I used a small make-up applicator and Memento inks, and I used a copic marker to add colour to the sheep.  They were so white against the fluffy snow that you could barely see them. For the snow I used Aleene's Glitter Snow paste. I was able to get a couple of scrap pieces from the North Wind paper pack to complete the background on the front and on the inside.  This card measures 6.5" x 5".

Here is the small list of supplies I used.  Remember, if you like them, put them on your wish list and when a Special Sales event comes around, you can then purchase them.


Thanks so much for stopping by today. I hope I was able to inspire you to create a project, and  play along with us at the Dies R Us Challenges for your chance to win a gift certificate to the Dies R Us Store.  A new challenge begins on the 1st and 15th of each month. Visit our challenge blog, where my team mates showcase their creations to provide you with more inspiration.  Be sure to follow us on Facebook and Pinterest too.  


And don't forget to visit our sister store, Didi Crafts.  It has warehouses in the US and Canada. This means that our Canadian friends no longer have to worry about huge taxes or expensive shipping fees.  It has some products that are the same as Dies R Us, but in addition, it carries international dies,  and other crafty supplies for a variety of crafts.  Go take a peek and be pleasantly surprised!

Crafty hugs,