Showing posts with label Stitched Border. Show all posts

12 August 2026

Crafty Gals Corner #279 ~ Anything Goes w/twist - Summer Vibes

    Hello crafting friends and welcome to our monthly challenge
 at Crafty Gals Corner! I hope you're all enjoying the end of your Summer!


  The theme for our challenge this month is

~ Anything Goes w/optional twist - Summer Vibes ~

It was my daughter's birthday last week and since she loves everything to do with the sea, I created this easel card for her.


When closed for mailing, this card measures 5.5" x 5.5".  There is a little bulk to it with the sea shells but since I hand delivered it, it was not a problem.  If I had planned on mailing it, I would have used sea shell dies instead of using the real small shells.

These are the crafty supplies I used to make this card:
Marianne Design - Sea Shells Stitching Border
DMC Embroidery Floss - various colours used (3 strands)
Cottage Cutz - Sand Dollar
Memory Box - Seahorses
Sue Wilson - Aquatic Plants
Joy! Crafts - Bille's Coral
Cardz TV - Mini Messages

Thanks so much for stopping by today.  We would love to see you play along with us.   You have until noon, CST, on 8 September 2026, to link your project to

Hugs,

21 September 2022

Under the Mistletoe

 Hello and welcome back. Do you know that there are only 95 days left till Christmas? 
I definitely need to work on my Christmas card stash, so with that in mind, I created this card.


I'm really loving this Christmas Stitching Border die from Marianne Designs.  I used it on a 5.5" x 5.5" card. I used 4 strands of DMC embroidery floss of each colour to stitch each element.


To pair with this beautiful edge, I picked a tag from the Christmas in Acorn Woods Tag Pad, by Hunkydory, and cut it using the Arched Window Nesting dies also from Hunkydory. I cut another arched window out of GinaK's red card stock and used that to mat the image and to match the red border of inside of the card.


To finish it off, I stamped the Christmas sentiment which is from Paper Inspirations and it is called Christmas Peace.  An oldie but still a goodie 😀

I'll be back soon with another Christmas card, so stay tuned. 

With this card, I'm playing along at

Crafty hugs,

08 August 2022

A Day at the Beach

I hope you're having a great Monday and that it's the start to an awesome week.

I have a summer card to share with you today.  I just became a member of the Small Die of the Month club at Spellbinders.  I normally don't do clubs, but I really liked this die and it doesn't seem that Spellbinders wants your first born in order to become a member either 😀

I had stitched this Seashells Border, from Marianne Designs, and was just waiting for the perfect way to add to it.  When I got this Day at the Beach die set, I thought that it would work well together.


 This turned out to be one of the cards I made for my daughter's birthday.  My mom had asked me to make a card for her, and since my daughter loves the beach, I thought this turned out perfectly.

I used the following supplies to make my card:

Marianne Designs - Stitched Sea Shells Border
Marianne Designs - Pin Numbers
Spellbinders - A Day at the Beach die set
Karen Burniston - Happy Birthday
Lawn Fawn - Sunray Background stencil
Silhouette - Coconut Drink
Craft Consortium Papers - Tropical Paradise - Bathing Suit
Cardstocks - Scraps drawers
Distress Oxide inks - Mustard Seed
Various colours of DMC embroidery floss

Thanks so much for spending a little time with me. I hope you come back again to visit soon. And if you have the time, I would love to read what you think by leaving me a comment. 

Till next time,


15 March 2022

Dies R Us #189 ~ Stitched Ice Crystals Border

 Hello everyone and welcome.  A new challenge begins today at Dies R Us.


Challenge #189 ~ Anything Goes 
Our only requirement for you to play along with us, is that you use a die on your project that is sold at the Dies R Us store.  And, of course, that your project applies to our monthly theme 😀

Since this month the theme is Anything Goes, I had to try out my new dies I recently purchased during one of the International Dies sales events.  I'm sure you know by now, but in case you are new to my blog, the best way to know about these special order events is to subscribe to the Dies R Us newsletter HERE.


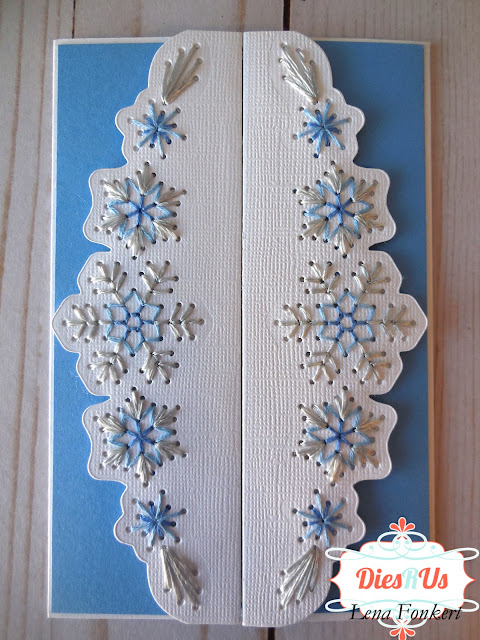
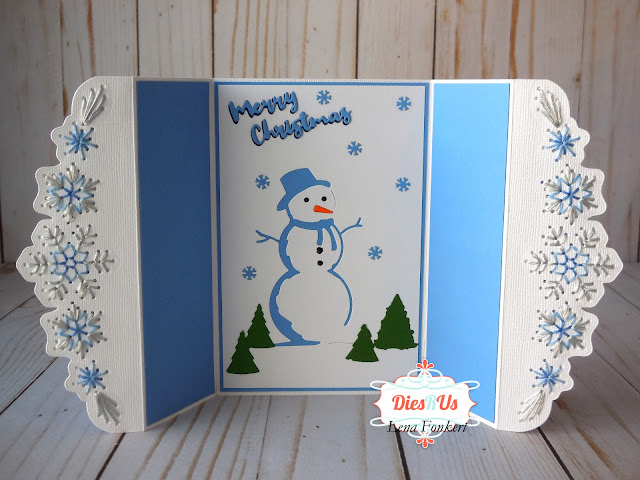
I started with a piece of 12" x 6" cardstock and scored it at 2", 4", 8" and 10".  This gives you a 4" x 6" card when closed.  Next I die cut the Ice Crystals border on both end flaps of the card and got busy stitching the snowflakes. So much fun and you can make them in so many different patterns and colours, the possibilities are endless! I'm really loving these stitched border dies.  Can't wait to get my hands on the newest ones 😀  I used 3 strands of the DMC embroidery floss to stitch the snowflakes.  I'm a little disappointed that you can't see the silvery shine of the white satin floss on the pic.  It really does look so much prettier in person.

On the inside I made a winter scene without adding too many layers, as this would interfere with the closing of card.  If you do add a few layers and see that your card no longer stays closed nicely, you can always make a belly band.  I just didn't want to take away from the beauty of the stitched border.


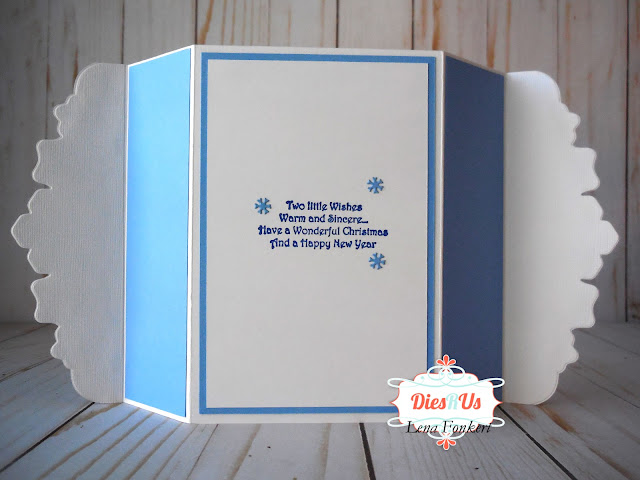
I made a double mat at the back  so that I will have plenty of space to write my personal message.  As you can see it fits perfectly in a regular A7 envelope.

Here are the supplies I used to make this card. I have linked what I could to the Dies R Us store, but remember that some of the dies I used are only sold during the International Dies sales events which happen every so often.

(Currently out of stock, but any small tree and tiny snowflake dies would work)

Thanks so much for stopping by and spending a little of your day with me.  I hope I was able to inspire you to create a project, and  play along with us at the Dies R Us Challenges for your chance to win a gift certificate to the Dies R Us Store.  A new challenge begins on the 1st and 15th of each month.  There is a prize to be won with every challenge.  Visit our challenge blog, where my team mates showcase their creations to provide you with more inspiration.  Be sure to follow us on Facebook and Pinterest too.  


And don't forget to visit our sister store, Didi Crafts.  It has warehouses in the US and Canada. This means that our Canadian friends no longer have to worry about huge taxes or expensive shipping fees.  It has some products that are the same as Dies R Us, but in addition, it carries international dies,  and other crafty supplies for a variety of crafts.  Go take a peek and be pleasantly surprised!

Crafty hugs,

May you always have love to share,
health to spare, and friends that care! 


09 March 2022

Crafty Gals Corner #229 ~ Add a Flower

  Hello crafting friends and welcome back to another fun challenge
 starting today at Crafty Gals Corner


Challenge #229 ~ Add a Flower

Our wonderful sponsor for this challenge is 

Prize ~  $10 Gift Certificate

I decided to add a Poinsettia flower in the form of a stitched edge to my card. I think this lovely edger is perfect to showcase the beautiful  Quilted Santa digital image I used from Beccy's Place.


I printed this Santa pre-coloured digi onto photo paper. I love the vibrant colours that came out.  So festive, don't you think? I adhered it to the card with pop dots to add a little dimension.


For the Christmas Stitched Border, by Marianne Designs, I used DMC floss in green and two different shades of red, one for the flower and the other for the berries. On the center of the poinsettia I used a few gold gems from Marianne Designs.


On the inside, I cut another piece of white cardstock and adhered it to the back of the front flap so you don't see any stitching.  I added a red mat and a smaller white mat where I stamped the sentiment.  This is a stamp from Paper Inspirations called Christmas Peace and was stamped using VersaFine Onyx Black ink.

Thank you so much for stopping by. I hope you liked my card, and feel inspired to get crafty and come play along with us. You have until 12:00 pm, CST, on 12 April 2022, to link your project to our challenge.

Crafty hugs,