Showing posts with label io Dies. Show all posts

01 May 2020

DRU Challenge #144 ~ Seas the Day!

Hello crafting friends and welcome to a new challenge at Dies R Us.

Challenge # 144 ~ Seas the Day!
(Water themed project)

I'm a very tropical kinda person, so this challenge is right up my alley!
I had so much fun putting this lovely beach scene together, and wishing all the while that I was somewhere there with one of those pineapple fru-fru drinks in my hand.  During this isolation ... one can dream and plan 😁


There really isn't much to tell about this card. I die cut all the pieces, shaded some  for a little extra dimension and just built my scene as I went along.


On the inside, I very lightly sponged the bottom left corner and adhered a couple of shells I had left over. I left the inside blank to write my own personal message.

As always, here is a list of supplies I used, each linked to the Dies R Us store for your convenience.

I'm sure you know by now, but for all the newbies to Dies R Us, I would like to mention that  every so often, Dies R Us runs a big sale on international dies. It's during these special sales that you will find dies from companies such as Marianne Designs, Lea'bilities, and Joy Crafts among others. The best way to know about these fabulous sales is to subscribe to the Dies R Us Newsletter


Dies R Us' sister store,  Didi Crafts, is now open. It has warehouses located in the USA and Canada.  It has some products that are the same as Dies R Us, but in addition, it carries international dies and other crafty supplies for a variety of crafts.  Go take a peek and be pleasantly surprised!

Thank you so much for stopping by today.  I hope I was able to inspire you to create a project, and  play along with us at the Dies R Us Challenges for your chance to win a gift certificate to the Dies R Us Store.  A new challenge begins on the 1st and 15th of each month.  Be sure to follow on Facebook and Pinterest too.

Till next time, stay safe and healthy!
Hugs, 

08 September 2017

Christmas Gift Tags

Hello crafting friends. It's my turn today to share a project on the DiesRUs inspiration blog. For my project, today, I made a few Christmas gift tags.


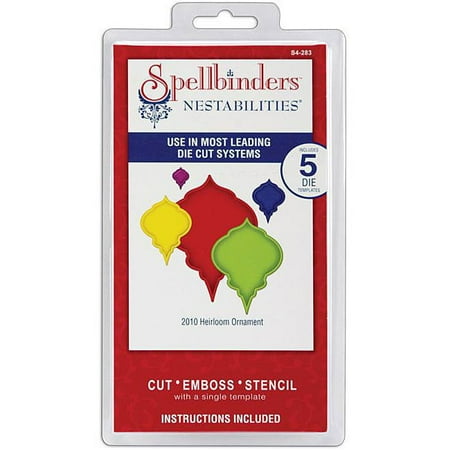
I began by looking through my stash of dies and deciding on a base tag shape.  I thought that the Spellbinders Heirloom Ornaments 2010, 2011, 2012 and 2013 were the way to go.


 I placed the shapes and sizes I wanted on my magnetic shim.  Next I took the Impression Obsession Christmas Circle Cutouts dies and placed them neatly centered inside the base dies. At times like these, I really find that the magnetic shim is wonderful as it keeps all the dies in place.  If you don't have one, no problem, you can just adhere the two dies together with some removable tape and cut them as normal.


Next, I removed the circle cutout dies and cut the same base shapes again out of the same white cardstock. These will be used for the backing of the tags.


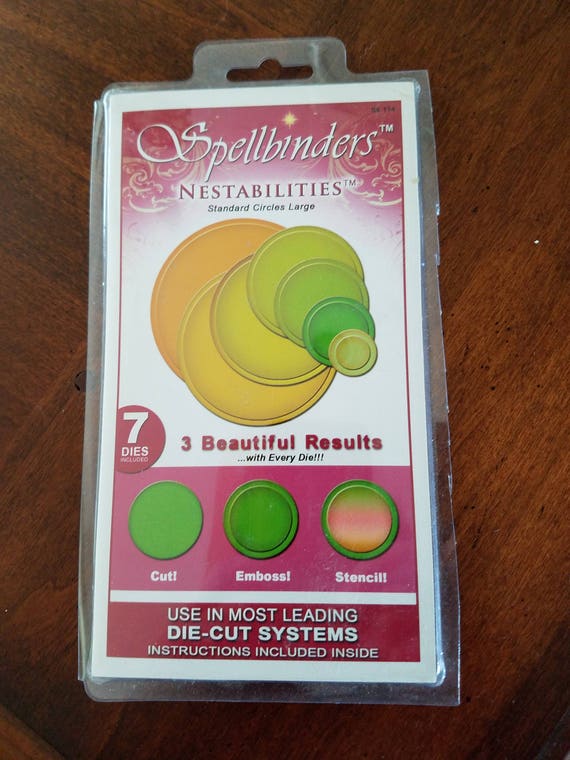
After deciding what colours I wanted to use as the background for the circle cutouts, I used a circle die from the Spellbinders Circle Dies set and cut out various circles in red, green, navy, sky blue and silver glitter cardstocks.


Once I had my backing pieces cut out, I stamped the "To" and "From" on the back of each using Versafine Black Onyx ink.  I love the sharp crisp images you get with this ink, even if it does take a little longer to dry.  Remember that this ink is not alcohol marker friendly.  If you're going to use your copic markers or other alcohol based markers, you should probably use something like the Memento Tuxedo Black ink.

I've shared with you before, that I keep all my dies on the little pink bucket (you can see it on one of the pics above) in order to prevent them from getting lost amidst all the other supplies or even thrown away.  Well, I do a similar thing with my cling stamps.  I purchased a cheap acrylic photo frame and that is where I put all my stamps until I'm finished with my project. This helps me because I know that they won't get lost or damaged.  It also helps that they're all in place when it comes to cleaning them before putting them away.


Once I had all my bits and pieces, I started assembling them. I glued the colour circle to the back of the cutout die and then the backing on top. When they were all done, I felt they needed a little more embellishing, so I cut out a few more of the shapes in glitter cardstock and used the little cut out pieces to paper piece some additional colour onto my tags. You can see this on the tags with the holly, the bells and the Christmas tree.  The tag with the candy cane, I used red stickles to make it sparkly and give it dimension. On the bauble and snowflake tags, I simply added a few rhinestones.

Lastly, I took an assortment of ribbons and twine and finished off my tags.
These are very simple to make and the possibilities are endless.  You can change shapes, colours, bling, ribbons, etc. to make them unique and fun.

Here is a quick recap of the dies I used:

Image result for impression obsession christmas circle cutouts

Spellbinders Nestabilities cut emboss stencil 2012 Heirloom Ornaments Die S5-116

Image result for spellbinders heirloom dies 2011

Image result for spellbinders heirloom dies 2012

Image result for spellbinders heirloom dies 2013


If you don't have the Heirloom Ornament dies, it's not a problem.  All you have to do is visit the DRU store and enter "Ornaments" in the search bar.  There are so many options that pop up, and these will all serve as a great background for your circle cutouts in addition to creating other beautiful ornament projects.

I hope I was able to inspire you to use your dies to create some Christmas tags for the gifts for those special people in your life. I hope you will come play along at the Dies R Us Challenge Blog for your chance to win a gift voucher to the Dies R Us Store.  A new challenge begins on the first and fifteenth of every month.  Be sure to Follow Us on Facebook too. 


Till next time,

19 April 2017

Surf's Up, Santa! :-)

Hello crafting friends. I hope you all had a wonderful Easter with your loved ones. I still have a few Easter cards to share with you, but today is all about the new challenge at Crafty Gals Corner!


Challenge #119 ~  Embellish It!


Our sponsors this week are:

Prize ~ $15 Gift Certificate


Doctor Digi
Prize ~ 2 Digital Images


I'm so ready for Summer! :-)  I've been having loads of fun creating beach scenes.
I used Surfin Santa from Dr. Digi's to create this fun Santa card.  Growing up in Durban, South Africa, we often saw "Surfin Santas".  Just surfers that would dress up in red swim shorts and wear a Santa hat and hit the surf.  I can tell you that they all came out of the water sans hat :-)
I started by using a 6.5" x 5" white Recollections card.  Then made all my die cuts and started building the scene.  I used X-press It white card stock to print Santa. I find it easier to blend with copic markers on this cardstock.  Here is the list of dies I used -
Wave - Yvonne Creations
Palm Tree - Yvonne Creations
Crab - Cottage Cutz
Seagulls - Impression Obsession
Sun and Sandcastle - used Cricut Explore
The stamps are both from Cardz TV - Gingerbread Christmas and Big Holiday Wishes

Thanks for stopping by today.  I hope you have enjoyed your visit and will play along with us this week.   You have till noon, CST, on Tuesday, 25 April 2017, to link your project to the Crafty Gals Corner blog.

Till next time, happy crafting!
Hugs,


14 April 2017

Chillax Father's Day Card at Dies R Us

Hello crafting friends.  I'm back today to share a card with you that I made for my hubby for Father's Day. Since we are a "tropical beaches" loving family, I thought this card perfect for hubby.


Can't you just picture yourself sitting on this chair with one of those fru-fru tropical drinks in your hand and just Chillaxing? :-)


I started off with a white, 6.5" x 5" card base by Recollections and in small circular motions, sponged the front of the card with Memento Summer Sky ink. I always use sticky notes to tape off any sections that need to remain ink free.


Next I used the following dies to create my scene:
I also tore a piece of beige card stock to make the sand.


I cut the palm tree three times.  Once in the brown and the other two times in the green. I cut a little here and trimmed a little there so that I ended up with one palm tree trunk and two leaf crowns.  I placed foam tape on the bottom layer to add a little dimension to the scene.

While assembling my card, I felt like it needed a few extra things to make the scene complete, so I cut some cloudsbeach grass and seagulls, all from Impression Obsession Dies.  I stamped the greeting, from Cardz TV "Just Chillin" stamp set,  right onto the biggest cloud using Versafine Black Onyx Ink. 


I used an Extra Fine Sharpie to colour in the tips of the wings and tails of the seagulls. 


I have a little tip to share with you that I find very helpful when using a variety of dies.  If you're like me, you don't pack your dies as you go along, but struggle to find all the bits and pieces at the end of your project.  Well, this of course, is a recipe for disaster in that, sometimes, the little dies disappear amongst the scraps and either end up in your scraps drawers or worse, in the trash.  In order to avoid this, I got into the habit of placing my dies in a little bucket that I have on my desk.  When my project is complete and I pack everything away, I know that I don't have to worry about losing any of my dies. There are some nifty little magnetized bowls that you can buy just for this purpose, but my little bucket works just fine for me.


  On the inside of my card, I sponged the sky again in the same manner as I did the front. I cut another piece of sandy paper for the beach sand and added a seagull and a little grass to finish it all off. The stamped sentiment is a stamp from the Cardz TV "Father's Day" stamp set.

Here's a quick look at all the dies I used on this project.


I hope I was able to inspire you to use your dies, create a project, and come play along at the Dies R Us Challenge Blog for your chance to win a gift voucher to the Dies R Us Store.  A new challenge begins on the first and fifteenth of every month.  Be sure to Follow Us on Facebook too. 


Till next time,
Crafty hugs,

05 April 2017

Gina Le Cat Witch at Crafty Gals Corner

Hello crafting friends. Hope you're all doing well!
Time for a new challenge at Crafty Gals Corner!


Challenge #117 ~  3+ Layers

Our sponsor this week is:
Prize ~ $10 Gift Certificate

Using Gina Le Cat Witch from MoonFlower Digi's, I created this Halloween card. It's never too soon to work on your Halloween stash :-)


Crafty Ingredients
Card base ~  Recollections - 5.5" x 5.5" 
Card stocks ~ Recollections
Mat die ~ Marianne Designs - Anja's Circle
Broom and Bats  dies ~ Cottage Cuts
Sprig Flourish die ~ Spellbinders
Halloween Town Border die ~ Impression Obsession
Stamped Sentiment ~ Michaels Dollar Bin
Flowers ~ Recollections

Thank you for stopping by today.  I hope I have inspired you to make a project to play along with us this week.   You have till noon, CST, on Tuesday, 11 April 2017, to link your project to the Crafty Gals Corner blog.

Till next time, happy crafting!
Hugs,