Showing posts with label Cross Stitch. Show all posts

13 March 2024

Crafty Gals Corner #253 ~ Anything Goes

      Hello crafting friends and welcome to our March challenge


Challenge #253 ~ Anything Goes!

 Our sponsors for this challenge are: 
(listed in alphabetical order)


Prize ~ 2 Digital Images

* * * * * * * * * *

Prize ~ 3 Digital Images

* * * * * * * * * *
I needed a couple of cards for different occasions and so loved the images from our sponsors this month that I have a project from each to share with you.

My first project was made using the Pint (Colour) & Beer Backing Papers from Dr. Digi's House of Stamps, to create this masculine birthday card.  


I used a Silhouette design to cut out the base of my card and to generate the sentiments.  This is a 6.5 x 5" card and fits perfectly into a A7 envelope. The large beer mug was printed on photo paper.  This gives you a crisp image and the littled added shine from the photo paper adds to make it look more real :-)  On the other hand though, I could not use anything to make the foam more realistic because it would not stick to the photo paper and one of the pastes actually ate away at it.  It was not pretty, I assure you.  Lesson learnt!

Now for my other project:

Using the  Leprechaun Hat with Shamrocks from Pattie's Creations, I created 
this St. Patrick's Day card. 


The stitched shamrock pattern was found on Pinterest, and resized to fit the corners of my card.  I used variegated DMC floss to stitch the shamrocks and the border.  I was going to cross stitch the entire border, but found that I actually like it better this way.  I print and cut the image a few times so that I could add an additional layer to create a little dimension, and to have a layer of the shamrocks to place on the inside.  When it was all done, I felt that it was just too green and white so I added the cute lil ladybirds. The sentiment is a stamp from the Happy Days stamp set by Cardz TV.  This is a 5.5" x 5.5" card and fits perfectly into a 5.75" square envelope.

And that is it for this month's challenge at Crafty Gals Corner.  Thanks so much for stopping by.   I would love to you see you play along with us.  You have until noon, CST, on 9 April 2024, to link your project to our challenge.

Crafty hugs,


29 February 2024

Christmas Crafts All Year 'Round - Stitched Polar Bear

 Hello and welcome to March's Christmas challenge at Christmas Crafts All Year 'Round.  This is one of my favourite months - it's St Paddy's month, my son's birthday, my mom's birthday and my birthday too, which falls on Easter Sunday this year!  How cool is that? 😀


Our challenge this month is Arctic or Antarctic Animals.
Here is our inspiration pic ...


I didn't go with a cute penguin from Antarctica though, I went with a cute polar bear  from Arctica instead.  


Inspired by my friend Deanne, and having several sweater dies, I decided to use this Stiched Sweater die from Marianne Design. The floss I used is from Artiste, and the polar bear pattern was found on Pinterest.


It was quite a bit of work, but I love the way it came out.


For the background, I used a sheet of this beautiful Winter paper from the Perfect Pop Ups paper pad by Made to Surprise. For the greeting I used a die from Spellbinders, called Make it Merry Sentiments.


I cut out the trees in green and white to give it the appearance of snow on evergreen forest trees.  This tree die is from Studio Light.  The pretty little Cardinals were cut using the Birch Trees die from Impression Obsession.


On the inside I used a little cut out of the Winter paper and matted it onto blue cardstock to match the rest of the card.

Talking about Arctic and Antarctic animals I have a fun fact to share with you, which of course you may already know, but just the same here goes ~
there are no penguins in the North and there are no polar bears in the South Pole. I remember being taught this at school, (way back when) but wasn't sure if it was still the case as I had read an article that a group of scientists were going to introduce penguins to the North.  Apparently it didn't go well for the small colony of penguins. From the follow up article I read, no body really knows what happened to them.  Scientists have also thought of placing polar bears in Antarctica, but it would disrupt the natural eco system down there, so they have shelved that idea for now.  I'm sure the penguins and the seals that live there are very happy about that.  There are apparently no large predators on the Antarctic landmass, so they only have to worry about whales when they go for a swim. I say leave these animals alone, they're exaclty where God meant them to be!  Just my 2c. 😀

Thanks so much for stopping by today. Now it's your turn to make a Christmas project, that falls within our challenge theme, and come play along with us.  You have till the end of the month to link your project to our blog at  Christmas Crafts All Year 'Round.


01 May 2022

Dies R Us #192 ~ Easter Basket

Hello and welcome to another challenge, starting today, at Dies R Us.


Challenge #192 ~ Anything Goes
(as long as you use a die that is sold at Dies R Us)

I made this Easter card for my hubby. It was fun to put together and it's always such a treat when dies from different companies work perfectly together to create just what you have in mind.


First, I stitched the little chick. Next I cut out all the pieces to create the basket. This die has the awesome ability to emboss the basket or you can use it as stencil, as I did, to colour the basket.  I cut out the various embellishment dies in pink, yellow, blue, and green so that I could mix and match when putting it all together. This was particularly useful when I made the little focal piece on the inside which acts as the stopper for the front of the card when it's open.


When the card is closed and ready to be mailed, this is what it looks like.


And this is the inside.  As you can see there is still a little bit of space at the top to write a brief message.  My stamped greeting is from a very old rubber stamp that has no name on it anymore, but I love the font, so I keep using it.

Now for the list of supplies used to make this card, each linked to the
Dies R Us store for your covenience.


I purchased the Marianne Design die during one of the International Dies sales events that Dies R Us has every so often.  The best way to know about these sales is to subscribe to their newsletter HERE.

Thanks so much for stopping by and spending a little of your day with me.  I hope I was able to inspire you to create a project, and  play along with us at the Dies R Us Challenges for your chance to win a gift certificate to the Dies R Us Store.  A new challenge begins on the 1st and 15th of each month.  There is a prize to be won with every challenge, you could be the lucky winner! If you have a minute, please visit our challenge blog, where my team mates showcase their creations to provide you with some wonderful inspiration.  Be sure to follow us on Facebook and Pinterest too.  


And don't forget to visit our sister store, Didi Crafts.  It has warehouses in the US and Canada. This means that our Canadian friends no longer have to worry about huge taxes or expensive shipping fees.  It has some products that are the same as Dies R Us, but in addition, it carries international dies,  and other crafty supplies for a variety of crafts.  Go take a peek and be pleasantly surprised!

Crafty hugs,

08 September 2021

Glow in the Dark Ghostie

 Hello crafting friends. I have a fun Halloween card to share with you today.

👻 It's a Glow in the Dark Ghost card 👻


With lights on ....
and with lights out!


How cool is that?


I first saw this glow in the dark embroidery floss on a fellow crafter's blog. She had done a snowflake.  I was totally surprised!  I don't do a lot of cross stitching, so I had no clue they made glow in the dark floss. How cool is that?! Well, I went investigating, and online shopping, and let me tell  you that it's not easy to find.  You can find it on Amazon, but it is rather pricey, almost 4 times the price I got it for at a Michaels near me. 

Now let me tell you that it took me forever to get this done!  I'm not very proficient at cross stitching as is clearly seen on my ghost above.  It's all stripy and I believe it's caused by uneven tension of my stitches.  Well, that might very well be, but guys this floss was not easy to work with either.  And, yes, probably because of my lack of experience, but this floss is a little stiffer than the normal floss and it frails as it catches on the paper.  I had to stop and untangle the floss with almost every stitch - now are you surprised that the tension of the stitches is all messed up? 

I used the Cross Stitch Canvas die from Altenew which was great, but the holes are miniscule compared to the cross stitch dies from other companies.  It's wonderful for larger pieces because the spacing is almost as small as normal cross stitch fabric, but it really was a labour of love.  There was definitely sweat, blood and very close to tears.  Sweat as I tried to keep count of those tiny holes, blood as I pricked my finger a few times and very close to tears of pure frustration 😀  But if you're one of my followers, you know by now that I'm stubborn determined, so I was going to get through it, finish it, and I did!

The background scene was taken from Google. The card base is a design from the Silhouette store. The inside was made using one of the new Whimsy stamps.

Between you and me, this card is going to hubby.  That way I get to keep it when he's done with it.  There is no way I'm going to part with this card 😀  That little ghost is just too darn cute glowing in the Halloween night sky.

Well, I hope you liked my card. Any and all comments and suggestions are very welcome. Trust me when I tell you that I need all the help I can get 😀

I'm going to play along at


Till next time,
stay safe and healthy.

17 August 2021

Witchy Pumpkin

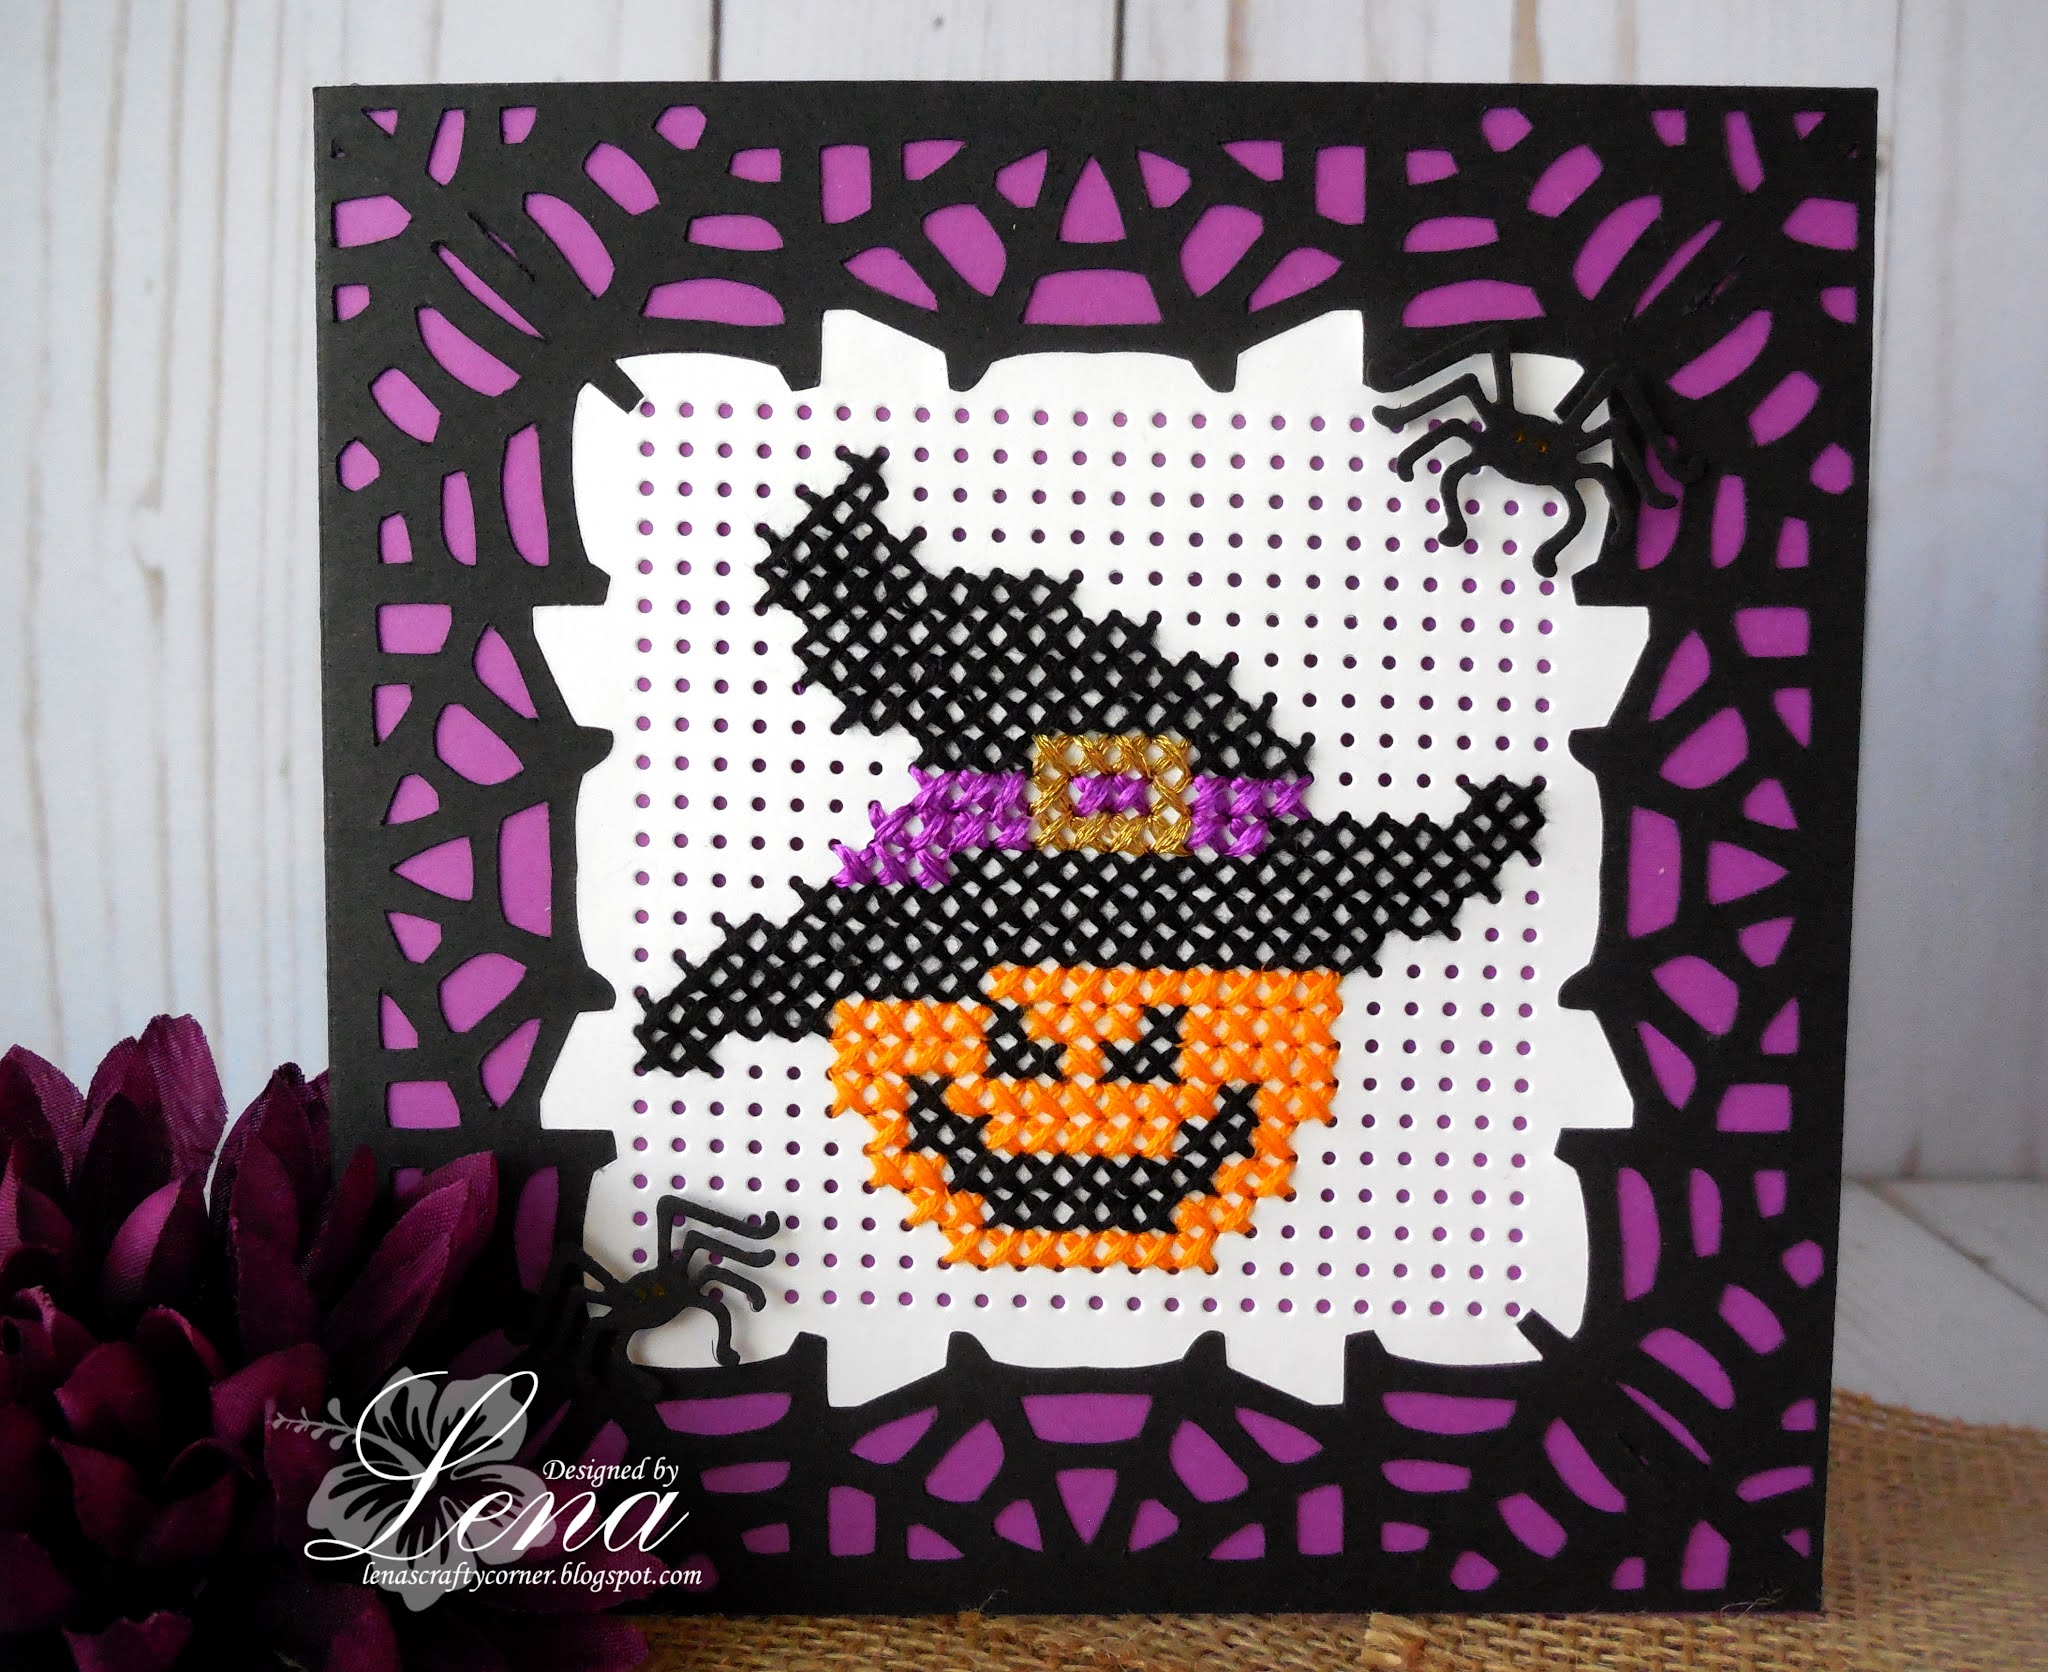
 Hi everyone.  I saw this cross stitch pattern on Pinterest and decided to give it a go.
I think it turned out cute, what do you all think?


The web frame on the front is a file from Silhouette.
I used 4 strands of each colour, of DMC embroidery floss, to stitch the image in the different colours.
The gold and the satin plump flosses are both from Artiste.
Cross Stitch Large Square die is from Marianne Design.
Inside Happy Halloween Web die is from Cottage Cutz.

That's it, another Halloween card done to add to my Halloween stash :-)

I'm going to play along  with 

Crafty hugs,


01 December 2020

Dies R Us #158 ~ Christmas

  Hello crafting friends.  It's here!  December is here, which means Christmas is just around the corner.  My favourite time of the year!!! Can you tell?  :-)

A new challenge begins today at Dies R Us, and in keeping with the most wonderful time of the year, our challenge is Christmas!! :-)


Challenge # 158 ~ Christmas

For my card today, I did a little cross stitching to make this beautiful Rudolph's head.
I love the way it came out, what do you think?


I find that a Z-fold is always easy, and always adds just that extra little bit of interest to a card.
The rest, as you can see, was very easy to put together, using the dies I listed below, and as always they are linked to the Dies R Us store, for your convenience.
Most of you already know this, but for those who don't, Dies R Us has special order events every so often. At these times you can purchase a variety of international dies such as Marianne Designs, Lea'bilities, Joy Crafts, and a few others.  The best way to know about these special order sales is to subscribe to the Dies R Us newsletter.  Sign up is on the front page of store's website.

I used Merry Christmas from Yvonne Creations which is currently out of stock.
But a great substitution would be Merry Christmas from Elizabeth Craft Designs.

Thank you so much for stopping by today and sharing a little bit of your day with me.  I hope I was able to inspire you to create a project, and  play along with us at the Dies R Us Challenges for your chance to win a gift certificate to the Dies R Us Store.  A new challenge begins on the 1st and 15th of each month. Visit our challenge blog, where my team mates showcase their creations to give you a little more inspiration.  Be sure to follow us on Facebook and Pinterest too.

Before I go, I'd like to remind you that Dies R Us' sister store,  Didi Crafts, is now open. It has warehouses located in the USA and Canada.  It has some products that are the same as Dies R Us, but in addition, it carries international dies,  and other crafty supplies for a variety of crafts.  Go take a peek and be pleasantly surprised!

Till next time,
stay safe and healthy!


29 September 2019

X-stitch Santa Teddy Card

Hello and welcome back crafting friends.
I'm on the Dies R Us Inspiration blog today sharing a X-stitch Christmas card. I hope you took advantage of the wonderful sale of international dies that Dies R Us  just had.  It's during these sales that you'll find dies from companies such as Marianne Designs, Lea'bilities, and Joy Crafts among others. The best way to know about these fabulous sales is to subscribe to the Dies R Us Newsletter.


As you can see, I used a variety of dies to make and adorn this card. 
For the top of this centre fold card, I used the Merry Christmas Text  from Jeanine's Art.  For stitching the Santa Teddy, I used the Cross Stitch L  from Marianne Designs.  To add a little extra on the sides, I added a Winterfun Corner from Precious Marieke to each side. This is a corner die but for my little straight sides, I snipped off the little corner flourish.  The tiny poinsettias on the bottom were cut using the Petite Poinsettia from The Frantic Stamper.  I also added a few snowflakes here and there for fill in some gaps that I felt needed a little extra something :-)  To cut those, I used a die set from Art Impressions.  I'm not sure that you can get it at the DRU store anymore because it is an old set.  A good replacement set is the Mini Snowflakes  from Lawn Fawn.  I have linked to it below.  The beaded trim around the stitched square was cut using Karen Burniston's Party Border Blends.  All that was left was to add a few gems here and there and it was done.


On the inside I made a frame for my message using the Doodle Square  from Marianne Design and then added a snowflake from the same set that I used above.


I love centre fold cards. They're fun to open, not hard to make and fold completely flat for mailing, so no extra postage needed as long as you don't add bulky embellishments.


When I saw this Santa Teddy pattern, it called my name.  Well, it is a little bigger than the Cross Stitch L  die.  So in order to add another 3/4" of the pin holes, I moved my die around the original square and ran it through the die cut machine again.  It's really easy to do since the holes from the die nestle beautifully into those that are already cut in the cardstock.  I do strongly suggest you secure your die with removable tape, or you will end ruining your original cut.  Yup, I learnt the hard way :-)

As always, here is a  quick guide to the crafty supplies used,
 each linked to the Dies R Us store for your convenience.


I hope you enjoyed my Christmas card today.  Christmas will be here before you know it, so I hope that I was able to inspire you to use your dies, create a project, and come play along with us at the Dies R Us Challenge Blog for your chance to win a gift voucher to the Dies R Us Store.  A new challenge begins on the 1st and 15th of every month.  Be sure to follow us on Facebook and Pinterest too.


Crafty hugs and until next time,