Showing posts with label Spellbinders. Show all posts

30 April 2025

Christmas Crafts All Year 'Round ~ I'll be Home for Christmas

  Hello and welcome to this month's Christmas challenge at
 Christmas Crafts All Year 'Round.


Our inspiration song for May's challenge is 𝅘𝅥𝅮𝅘𝅥𝅯 I'll be Home for Christmas 𝅘𝅥𝅮𝅘𝅥𝅯.  This means that you can use any verse, phrase or word in the song to create your Christmas project.  Here are the lyrics of this song for your inspiration

~ I'll be Home for Christmas ~ 
I'm dreaming tonight of a place I love
Even more than I usually do
And although I know it's a long road back
I promise you
I'll be home for Christmas
You can count on me
Please have snow and mistletoe
And presents under the tree
Christmas Eve will find me
Where the love light gleams
I'll be home for Christmas
If only in my dreams
I'll be home for Christmas (I'll be home for Christmas)
You can count on me (you can count on me)
Please have snow (have snow) and mistletoe (yeah)
And presents under the tree (under the tree)
Christmas Eve will find me
Where the love light gleams
I'll be home for Christmas
If only in my dreams
In my dreams, my dreams
My dreams.

I went with the "I'll be home for Christmas" and " Please have snow and mistletoe" and created this card.


List of crafty ingredients used to make this card:
Spellbinders - Build a Winter Birdhouse
Spellbinders - Sweet Bird on a Branch
Art Impressions Stamps - Snowmen Flip Card (Sentiment)
Marianne Design - Snowman Winter Building Scene (lil bird on inside of card)

Thanks so much for stopping by.  Now it's your turn to make a Christmas project,  and come play along with us.  You have till the end of the month to link your project to our blog at  Christmas Crafts All Year 'Round.

Crafty hugs,

31 December 2024

Christmas Crafts All Year 'Round ~ The Christmas Song

   Hello and welcome to this month's Christmas challenge at
 Christmas Crafts All Year 'Round.   Deanne, our team leader, has come up with awesome challenges for 2025.  It's all going to be about Christmas Songs and Christmas Carols.  


To kick off the year, our inspiration song for January's challenge is The Christmas Song.  That means that you can use any verse, phrase or word in the song to create your Christmas project.  Here are the lyrics of this song to inspire you ...

~ The Christmas Song ~
Chestnuts roasting on an open fire
Jack Frost nipping at your nose
Yule-tide carols being sung by a choir
Folks dressed up like Eskimos
Everybody knows a turkey and some mistletoe
Helps to make the season bright
Tiny tots with their eyes all aglow
Will find it hard to sleep tonight
They know that Santa's on his way
He's loaded lots of toys and goodies on his sleigh
And every mother's child is gonna spy
To see if reindeer really know how to fly
And so I'm offering this simple phrase
To kids from one to ninety-two
Although it's been said many times, many ways
Merry Christmas to you
And so I'm offering this simple phrase
To kids from one to ninety-two
Although it's been said many times, many ways
Merry Christmas, have a Merry Christmas
Merry Christmas to you

For my card, I chose 🎵 Chestnuts roasting on an open fire ... 🎵 


These are the dies I used to create my card:
Marianne Design - Acorns & Chestnuts
Marianne Design - Stargate
Spellbinders - Christmas Cocktails


Image is from Google


Greeting is from the Noel Christmas Ornaments stamp set from JustRite Stamps.

Thanks so much for stopping by.  Now it's your turn to make a Christmas project,  and come play along with us.  You have till the end of the month to link your project to our blog at  Christmas Crafts All Year 'Round.

Happy New Year! May 2025 bring you all that makes smile!


30 November 2024

Christmas Crafts All Year 'Round ~ Bows, Gifts, Decorations

     Hello and welcome to this month's Christmas challenge at
 Christmas Crafts All Year 'Round. 
 

Our challenge this month is Bows, Gifts, Decorations

Here is our inspiration pic ...


I created this slimline card using the All Occasion Bow from Spellbinders.  


The background was embossed using the Modern Stripe Embossing Folder
by Teresa Collins.


 I made it in red and white and finagled some gold in there too so it looks like there is a gold layer.


For the centre of the bow, I used a small decoupage image of pinecones and berries.  I thought this would add a little festive touch.


 On the inside I used the Merry Christmas w/Shadow die set by Karen Burniston.

And that is a wrap for our Christmas crafts for 2024.  We have fun challenges for you beginning in January 2025, so I hope you come back and visit.
 
Now it's your turn to make a Christmas project, that falls within our challenge theme, and come play along with us.  You have till the end of the month to link your project to our blog at  Christmas Crafts All Year 'Round.

I wish you and yours a very Merry Christmas and a very Happy New Year!
Be Merry, have Fun, and stay Safe!

Crafty hugs, 


09 November 2023

Skelly Fun and BOO cards

Hello crafting friends.  I'd like to share with you today the last two of my Halloween cards for 2023.


This card was made using a Silhouette design with a Silhouette printable background.  Then I went thru my dies and added the ghost, bats, spiders, jack 'o lanterns, and the grass border.


On the inside, I added the left over die cuts I had cut, and added the sentiment.

For this next card ...


I used the Spellbinders Wreath builder dies together with the Halloween add-ons. 


Here is a closer look. The spiderweb patterned paper is from my scraps drawer.


I kept it very simple on the inside.  The greeting is a die from Creative Expressions. I cut it out in black and in orange so that I could create a shadow.

That is it for my Halloween 2023 projects. I hope you enjoyed my creations as much as I enjoyed making them :-)

I'm going to play along at 


Crafty hugs,


31 October 2019

The Stockings were hung ...

Hello and welcome to November's challenge at 
November Challenge ~ Stockings or other Winter Clothing
Prize: Please see the CCAYR blog for prize details.


This card was so easy and fun to put together. Since the image is so sweet and festive, I decided to use a fancy frame and not add any more embellishments that would take away from the image.

Here are the crafty ingredients I used to make this sweet Christmas card:

Card base - Recollections - 6.5" x 5" - white
Red and white card stock - The Paper Studio
Embossing folder - Swiss Dots - Cuttlebug
Decorative Frame - Spellbinders - Romantic Rectangles
Image - Hunkydory - Little Book of Snow is Falling
Glitter Dots - Elizabeth Craft Designs
Stamped sentiment - Great Impression Stamps

Thanks so much for stopping by today.  I'd love for you to create a project and join in the fun by linking it to our blog at Christmas Crafts All Year 'Round 
You have till the end of the month to link your projects.

Till next time,

13 October 2017

Autumn Fun Gift Card

Good morning DiesRUs friends. You know that moment when you open an envelope and out comes a really pretty card that makes you happy, and then you open the card and there is a little something extra for you on the inside? Don't you just love that feeling? :-) Since it's my turn today to share a card at the DiesRUs inspiration blog today, I decided to share one of those cards.


To make this standard A2 size card, I began by getting all my pieces cut in the papers I wanted to use. 


I stamped my tree trunk first and added some grass using a copic marker.  Once this was done, I created a mask for the tree trunk before sponging in the sky for the background.


Then came the fun part of stamping and colouring all the little bits and pieces.  I added a little dimension to my little guys by using foam dots.  And since this card is going in the mail, I decided to adhere a solid piece of foam to the back.


 To do this, you just trace the image on a piece of craft foam ... 


... and then cut it out a little on the inside of the trace mark. You can use any adhesive to adhere the foam to your image and/or your card.


Once the front of your card is done, it's time to work on the inside. The Gift Card Pop-Up die from Lawn Fawn, makes it real easy to make an insert for your gift card.  I cut another couple of mats and adhered them to the card.  This is what I will use to write my personal message.

That was it. A fun and very easy card to put together :-)


Here is a quick recap of the dies I used, all linked to the DiesRUs store for your convenience.


I hope you enjoyed my card and that I have inspired you to make a card of your own with a little something extra on the inside. Don't forget to play along at the Dies R Us Challenge Blog for your chance to win a gift voucher to the Dies R Us Store.  A new challenge begins on the first and fifteenth of every month.  Be sure to Follow Us on Facebook too. 


Till next time,


08 September 2017

Christmas Gift Tags

Hello crafting friends. It's my turn today to share a project on the DiesRUs inspiration blog. For my project, today, I made a few Christmas gift tags.


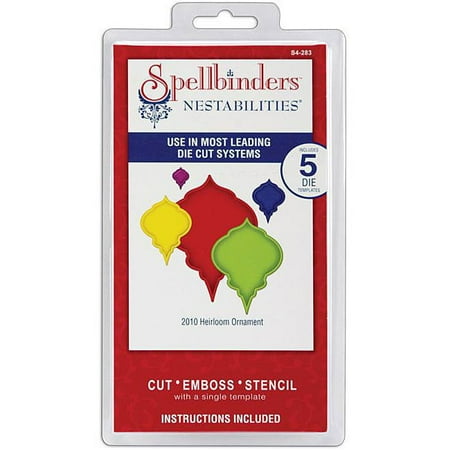
I began by looking through my stash of dies and deciding on a base tag shape.  I thought that the Spellbinders Heirloom Ornaments 2010, 2011, 2012 and 2013 were the way to go.


 I placed the shapes and sizes I wanted on my magnetic shim.  Next I took the Impression Obsession Christmas Circle Cutouts dies and placed them neatly centered inside the base dies. At times like these, I really find that the magnetic shim is wonderful as it keeps all the dies in place.  If you don't have one, no problem, you can just adhere the two dies together with some removable tape and cut them as normal.


Next, I removed the circle cutout dies and cut the same base shapes again out of the same white cardstock. These will be used for the backing of the tags.


After deciding what colours I wanted to use as the background for the circle cutouts, I used a circle die from the Spellbinders Circle Dies set and cut out various circles in red, green, navy, sky blue and silver glitter cardstocks.


Once I had my backing pieces cut out, I stamped the "To" and "From" on the back of each using Versafine Black Onyx ink.  I love the sharp crisp images you get with this ink, even if it does take a little longer to dry.  Remember that this ink is not alcohol marker friendly.  If you're going to use your copic markers or other alcohol based markers, you should probably use something like the Memento Tuxedo Black ink.

I've shared with you before, that I keep all my dies on the little pink bucket (you can see it on one of the pics above) in order to prevent them from getting lost amidst all the other supplies or even thrown away.  Well, I do a similar thing with my cling stamps.  I purchased a cheap acrylic photo frame and that is where I put all my stamps until I'm finished with my project. This helps me because I know that they won't get lost or damaged.  It also helps that they're all in place when it comes to cleaning them before putting them away.


Once I had all my bits and pieces, I started assembling them. I glued the colour circle to the back of the cutout die and then the backing on top. When they were all done, I felt they needed a little more embellishing, so I cut out a few more of the shapes in glitter cardstock and used the little cut out pieces to paper piece some additional colour onto my tags. You can see this on the tags with the holly, the bells and the Christmas tree.  The tag with the candy cane, I used red stickles to make it sparkly and give it dimension. On the bauble and snowflake tags, I simply added a few rhinestones.

Lastly, I took an assortment of ribbons and twine and finished off my tags.
These are very simple to make and the possibilities are endless.  You can change shapes, colours, bling, ribbons, etc. to make them unique and fun.

Here is a quick recap of the dies I used:

Image result for impression obsession christmas circle cutouts

Spellbinders Nestabilities cut emboss stencil 2012 Heirloom Ornaments Die S5-116

Image result for spellbinders heirloom dies 2011

Image result for spellbinders heirloom dies 2012

Image result for spellbinders heirloom dies 2013


If you don't have the Heirloom Ornament dies, it's not a problem.  All you have to do is visit the DRU store and enter "Ornaments" in the search bar.  There are so many options that pop up, and these will all serve as a great background for your circle cutouts in addition to creating other beautiful ornament projects.

I hope I was able to inspire you to use your dies to create some Christmas tags for the gifts for those special people in your life. I hope you will come play along at the Dies R Us Challenge Blog for your chance to win a gift voucher to the Dies R Us Store.  A new challenge begins on the first and fifteenth of every month.  Be sure to Follow Us on Facebook too. 


Till next time,