Happy Monday, crafting friends. May it be the start to a great week!
I have another stitched Christmas card to share with you, as well as a little information about these cards.
I have received a number of emails asking for information about my stitched cards so I thought I would write a post about them.
But first card number 5 ...
This card is from the Specialties book number 4.
This is the next book I will be working from. I get these books from Holland via my sweet SIL, Marian. I have not been able to find them anywhere here in the US. Each book has 12 precut card bases, 12 patterns and 12 multi-layered images. At the bottom, it tells you what foiled stickers you need as well as the colour of the embroidery cotton to use. They are usually themed - as you can see this one is Christmas. This book is already a couple of years old, I think that by now they are up to book number twenty something, but I'm trying to work my way through what I already have before getting the latest ones :-)
As you can see, the cards are precut so it's just a matter of punching them out. The book offers pictures of what the finished cards should look like. Of course you can change it anyway you want, but I like them the way they are, so I tend to stick to the same colours they advise and also use the same colour cardstock for the card base.
In the centre of the book, you have a few pages with the layered images. The only down side, for me, is the fussy cutting, which I don't really enjoy, but it's worth it in the end :-)
On the above pic, you can see the patterns offered for each card. I photocopy each, cut it to the right size, adhere it to the card (with removable tape) and with a piercing tool, prick the pattern onto the card.
As I mentioned above, the book tells you what foiled stickers to get and you can often buy them in a pack made for each book. I always get the sticker pack with the book.
Through the years and the various books and kits, I have accumulated quite a stash of embroidery cotton. So before Marian sends me the book, she lets me know what numbers the book calls for and I check in my box to see if I have all the colours. If I do, then it's all good, but if I'm one or two short, then she sends me those.
So from the above, you get something like this.
Then I make my own inside with my own stamped greeting and a little something extra. In this case, left over foiled stickers.
Once my card is done, I take photos and store it in a cellophane baggie with an envelope.
It is now ready to be sold or to be used.
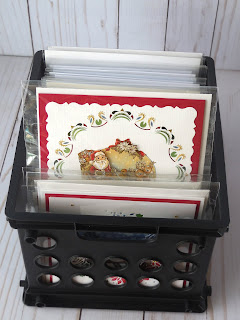
I store them in these Walmart mini crates inside my hobby room closet. They are the perfect containers for these cards. It keeps them neat and tidy and I'm able to fit about 50 cards per container. :-)
And there you have it. The whole process from start to finish. If you need any further information, please don't hesitate to contact me by email or leave me a comment below.
I'm playing along at
Thanks for stopping by today. Till next time, stay safe and well.
Hugs,


Another stunning creation, Lena... and thanks for showing us the books xoxo
ReplyDeleteYour 'special' cards are just GORGEOUS and how awesome that you have a contact in Holland to help you get the thread & books. You do such an amazing job with each & every one!!
ReplyDeleteI use a similar idea for my card storage but I use 'media' boxes that have 2 dividers within the box so it holds LOTS of cards and with my cards all being in sleeves like you do, people at the shows can thumb through them to see what they want without getting them dirty or fingerprinted. I also take a photo of the inside and print it out to include in the back of the clear sleeves so they can see what it looks like inside. If it's blank then they know it's also blank inside.
Beautiful work my friend ... thanks for taking the time to step us through the process! GREAT post!!
I wish I couls send you the newest ones too.
ReplyDeleteBut the postman does not cooperate.
So sorry