23 April 2024

New Home - Birdhouse Snowglobe

 Hello crafting friends.  Still trying to catch up on projects I've been steadily working on 😀

Today I'd like to share the New Home card I made for my son.  I don't often make New Home cards, but I had five to make in March :-)  I always think of birds and birdhouses for New Home cards, so I went with that idea.


I used several elements from different .cut files from Silhouette to put this snowglobe card together.


Also used a few punches to add the flowers and the butterflies. I added stickles to the center of each flower to add that little something special.


I kept the inside simple and with enough space to write my message.

That is is for today folks.  I'll be back tomorrow with my DT project for The Paper Shelter.
It's a yummy one, I promise! 😉  I hope  you'll come visit!

Crafty hugs,


17 April 2024

Birthday Card for a Painter

Hi everyone and welcome back. Today I'm sharing the card I made for my son for his birthday.
He has a business 3D printing D&D models and then he paints them by hand. It started as a hobby, but he's so good that he's had several orders (see bottom of post).  Thinking about all the painting he does, I thought this card would be fun for him.


This was the perfect card to use up a bunch of scraps too.  😀
The Painter's Palette is a die from Spellbinders.


On the inside I used the Happy Birthday w/Shadow die, from Kat Scrappiness, to cut out the greeting.  The paint splatters were cut out using a file from Silhouette.


I made this into a 5" x 7" card which fits perfectly into an A7 envelope.
And that was that for my card. My son loved it, so mission accomplished.

  I thought I would include a few pics showing off his painting.  The details are amazing on such tiny little models.  Of course he does larger ones too, but these little ones leave me in awe, especially when he paints entire armies of them. 


These little guys are only 1.5" tall and he managed to paint the pupils in the eyes!


An army in progress ...


This is one of the larger models.  This one is about 5.5" tall.  Isn't the painting amazing?


Look at the detail just on the base.  All painted by hand and then he added the little grass tuffets to make it even more realistic.  I guess he gets his painting skills from hubby, because I can't paint worth diddly!😀

Well folks that is it from me for today.
I'll be back soon to share a few more projects with you.

Crafty hugs,


16 April 2024

Flying by with a Happy Birthday!

 Hello crafting friends. I just got some new dies from Spellbinders and thought this one perfect to make a card for my for my son in law.


I started with a 4.75" x 6.25" card base in sky blue.  Next I cut out a bunch of clouds, in various sizes, using the Silhouette.  I adhered them here and there to add interest to the back ground.


I used scraps from my scraps drawer to cut out all the little pieces of the plane and of the banner.


I used foam squares to pop dot the plane and the banner to add a little dimension.


On the inside, I made a another sky blue mat and adhered the left over clouds. I wrote my personal message in the centre amidst the clouds. I think it came out cute and he loved it!

That's all for today. Thank you for stopping by.

Crafty hugs,


15 April 2024

Thinking of you ...

 Hello friends.  Today I'd like to share a card I made to send to hubby's aunt.
His uncle passed away this last week at a beautiful age of 104!
Rest in Peace Oom Hans!


This is a 5.5" x 5.5" card made using the following products:

Card base and envelope - Recollections
Floral die - Floral Dance by Crafters Companion
Stamped sentiments - Thinking of You - Inside & Out by Cardz TV
Used VersaFine Onyx Blac pigment ink to stamp the sentiments.
Pears are from Marianne Design and coloured using copic marker.

Since these are my least favourite cards to make, I don't keep any in my stash. And since I always go for CAS cards for this occasion, I'm rather happy with the way it came out.

That's all for today friends.  Thanks bunches for stopping by.

Crafty hugs,

10 April 2024

Crafty Gals Corner #254 ~ Anything Goes

     Hello crafting friends and welcome to our March challenge


Challenge #254 ~ Anything Goes!

 Our sponsors for this challenge are: 
(listed in alphabetical order)


Colour of Love
Prize ~ 3 Digital Images

*******
Prize ~ $10 Gift Certificate

A note from Rachelle Anne Miller:
I am an artist & designer living in the beautiful Adelaide Hills in South Australia with my husband and three amazing children! I love to create and am especially drawn to all things cute. I've worked on children's books, greeting cards, craft supplies, children's room decor, tech accessories, and more. I love to bring out joy and imagination in my art and create something a little different to inspire and make you smile.

*******
Using the very cute  Frolicking Eggberts from Colour of Love, I created this Easter card.


The card base is a file from Silhouette that I resized to fit my image.  I coloured the image with Copic markers and then added glassy accents on the Easter eggs, the centers of the flowers and the dew drops on the daisy petals.  I created the little daisies at the top of the card by using punches from Recollections, and for the final touch I added a couple of tiny white pom-poms for their little tails.


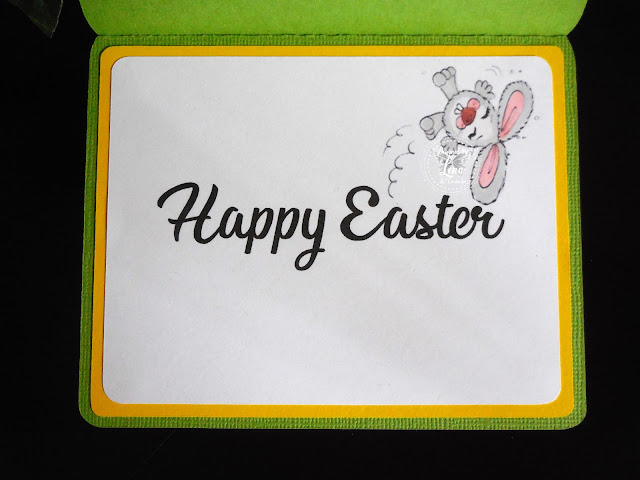
On the inside, I created a panel using one of the Eggberts and the sentiment. I used the same yellow cardstock, to create a layer, as I used on the front of the card.

That was it, very simple to put together but I think it came out pretty cute.
 It's also my first Easter card for 2025 😀

Thank you so much for stopping by today.  I would love to you see you play along with us.  You have until noon, CST, on 7 May 2024, to link your project to our challenge.

I'm playing along at

Crafty hugs,


The Paper Shelter #591 ~ Pets!

  Hello crafting friends and welcome to our newest challenge at the The Paper Shelter


Team A - our challenge this week is 
~ Pets ~

I know that Easter is barely gone, but it's never too early to start building your stash for other holidays.  So with this in mind, I made my first Halloween card for 2024 using this cute Little Witch and her Dragon digi set from The Paper Shelter.


The cross stitch pattern was found on Pinterest and adjusted to fit my 5.5" x 5.5" card.


I used the Silhouette to print and cut the image a couple of times and used foam squares in between each layer to add a little dimension.


For the inside, I used the background that comes in this digi set.  If you notice, I used a piece of this background for the front of the card too.  Just used the softer shades so that the cross stitch would pop.  The sentiment was computer generated and printed on the background pic.

So this is it for my card for this week.  I'd like to invite you to come play along with us.  Remember that The Paper Shelter offers a $30 gift certifcate to one lucky winner!  In order to get this prize, you must use a product from The Paper Shelter.  However, if you don't use a product from The Paper Shelter, you still stand a chance of winning 3 digis of your choice. 


I do hope you will come join the fun and share your projects with us.
You will find our challenge blog HERE.

I'm playing along at

Crafty hugs,


06 April 2024

Easter Bunny Hexagon Pop Up Card

Hello everyone. Today I'm sharing another Easter card I made using a Silhouette file.  I love fun folds and this hexagon pop up card is just that.  Easy to put together and fun to display.


All cardstocks and patterned papers are from my scraps drawers.  In fact, I used up a lot of scraps to make my Easter cards this year, but looking at my scrap drawers, it doesn't look like I even made a dent!


I made a little white panel and adhered it to the back so that I had a place to write my personal message.  It's small, so I kept the message small and simple too :-)


Another thing I love about this type of fold is that it folds flat for mailing and does not add a lot of bulk.  Perfect for mailing overseas :-)

I hope you enjoyed your visit today and will come back again soon.

Crafty hugs,

02 April 2024

Carrot Bunny Car

Hello everyone and welcome back.
Today I'm sharing the Easter card I made for my grandson.


I used a Silhouette file to cut this cut carrot card. 


Cardstocks are all from my scraps drawers except the dark orange one to create the base, that one is from The Paper Studio.


The back has the perfect mat to give you space to write your personal message.


I did increase the size of the card and made it as large as possible by putting the base of the card at a diagonal angle on the cutting mat.  I'm not quite sure of the size of the card, since I forgot to measure it, but it does fit into an A7 envelope perfectly, when folded for mailing.

That's all for today folks.  I still have a few more cards to share, so I'll be back soon.
Thanks so much for stopping by today and I hope you'll come back to visit.

Crafty hugs,


31 March 2024

Christmas Crafts All Year 'Round ~ Santa Ornament

  Hello and welcome to April's Christmas challenge
 at Christmas Crafts All Year 'Round. 


Our challenge this month is Gnomes/Santa/Elves.
Here is our inspiration pic ...


I decided to go with Santa and came up with this card.


I used the Christmas Ornament die from Marianne Design and cut out the ornament using gold mirri cardstock.  I also cut out additional trees and stars in green, red and gold cardstock, respectively.


This card has a beautiful shine to it but it sure was very hard for me to photograph.  Still want to do those photography classes sometime :-)  Even the Santa pic is made of a shiny cardstock.  It is from the 'Twas the Night Before Christmas, Mirri Magic Pad by Hunkydory.


I used the Swiss Dot embossing folder from Cuttlebug for the background and the Bows Punch die from Marianne Design to create the little bow on the ornament.  I topped it off with a tiny gold star.


On the inside, I used the bottom half of the Merry Christmas Tree die by Impression Obsession and used a left over tiny gold star to dot the "i".

Thanks so much for stopping by today. Now it's your turn to make a Christmas project, that falls within our challenge theme, and come play along with us.  You have till the end of the month to link your project to our blog at  Christmas Crafts All Year 'Round.

Crafty hugs,


Happy Easter!

 Happy Easter crafting friends! 
I'd like to share the Easter card I made for my mom.


This is what Easter is really all about for me and I know that since my mom feels the same way, that she liked it.  This design was cut using a Silhouette file. I resized it, and had to put it at an angle on the mat, but this way I was able to make it little bigger than the original file.


Here is a close up of this card. It really was easy to put together and does not have a lot of bulk which is important when you're mailing cards overseas.


 I adhered a plain white mat on the back of the card, so that I would have a place to write my personal message.


I mentioned that I resized this card.  It came out to be +/- 5.5" by 5.5" when folded flat for mailing and fits perfectly into a regular sized 5.75" square envelope.

I wish you and yours a very Blessed day filled with love, joy, good health,
and let's not forget the chocolates 😀

I will be back tomorrow with another Easter card.  We, as a family get together again and celebrate Easter Monday.  It's not really a thing in America, but we keep the traditions we grew up with.  It's fun!😀

Crafty hugs,